Showing posts with label tutorial. Show all posts

Wednesday, April 16, 2014

Free pattern: Bunny Egg Warmer


Today I have a free pattern for you.:)


Easter Bunny egg warmer/cozy.


To make these cuties you will need:
~ scraps of yarn (I used worsted weight)
~ Hook F/3.75
~ embroidery floss
~ tiny piece of felt for the nose
~ scraps of fabric for the ears lining

Lets make the COZY first.

Round 1 : Ch2,6 sc in the 2nd ch from the hook. (6)
Do not join, place the stitch marker.
Round 2: 2 sc in each st around. (12)
Round 3: sc in each st around. (12)
Round 4: *sc in 1st st, 2sc in the next st* repeat all the way around. (18) 
Round 5: sc all the way around. (18)
Round 6: *sc in the next 2 sts, 2sc in the next st* repeat all the way around. (24)
Round 7-11: sc all the way around. (24)
Round 12: crab stitch all the way around. Finish off.
The last round is optional, but I LoVe crab stitch (also known as “reverse single crochet” ! If you’ve never tried this stitch, you should :) Here is a great video tutorial. 


 Now let’s work on the EARS (make 2): 

 Round 1:CH9,  sc in the 2nd ch from the hook, sc in the next 3 sts, hdc in the next 2 sts, dc in the next sts, 3dc in the last st; now working on the other side of the foundation chain- 2dc in the 1st st(this stitch already has 3dc),dc in the next st, hdc in the next 2 sts, sc in the next 4 sts.
Round 2: sc all the way around.
Finish off. Repeat this to make second ear.


Now cut out the fabric for the lining and sew it to the inside of each ear.
I used crocheted ears as my templates, I placed them on fabric and traced around them with a fabric marker.
Now sew the ears to the cozy 


Add the  tiny felt nose and embroider the  eyes


And of course we can not forget about the cute bunny tail. 


And you are done! Hoo-ray! 

I wish everyone Happy Easter and Happy Spring! :) 


Pin It!

Wednesday, October 30, 2013

Spooktacular coffee cup sleeve tutorial

Today I wanted to share this very simple coffee cup sleeve pattern.


I decided to choose Halloween theme for this one, but of course, the possibilities are endless, especially with the Holidays coming. :)

To make this cup cozy, you will need:

- #3/light yarn

- crochet hook # F/3.75

The pattern: 

Ch36, join carefully-not to twist the stitches.

I am using tall Starbucks cup.

Round 1-4: sc all the way around. Place a stitch marker to know where each round ends.

Round 5: 2sc in the 1st stitch, sc in the next 17 sts, 2 sc in the next st, sc in the next 17 sts.

Round 6-13: sc all the way around.

Round 14: work crab stitch all the way around.

Finish off, weave in ends.


Now when the sleeve is done, the fun part begins;)


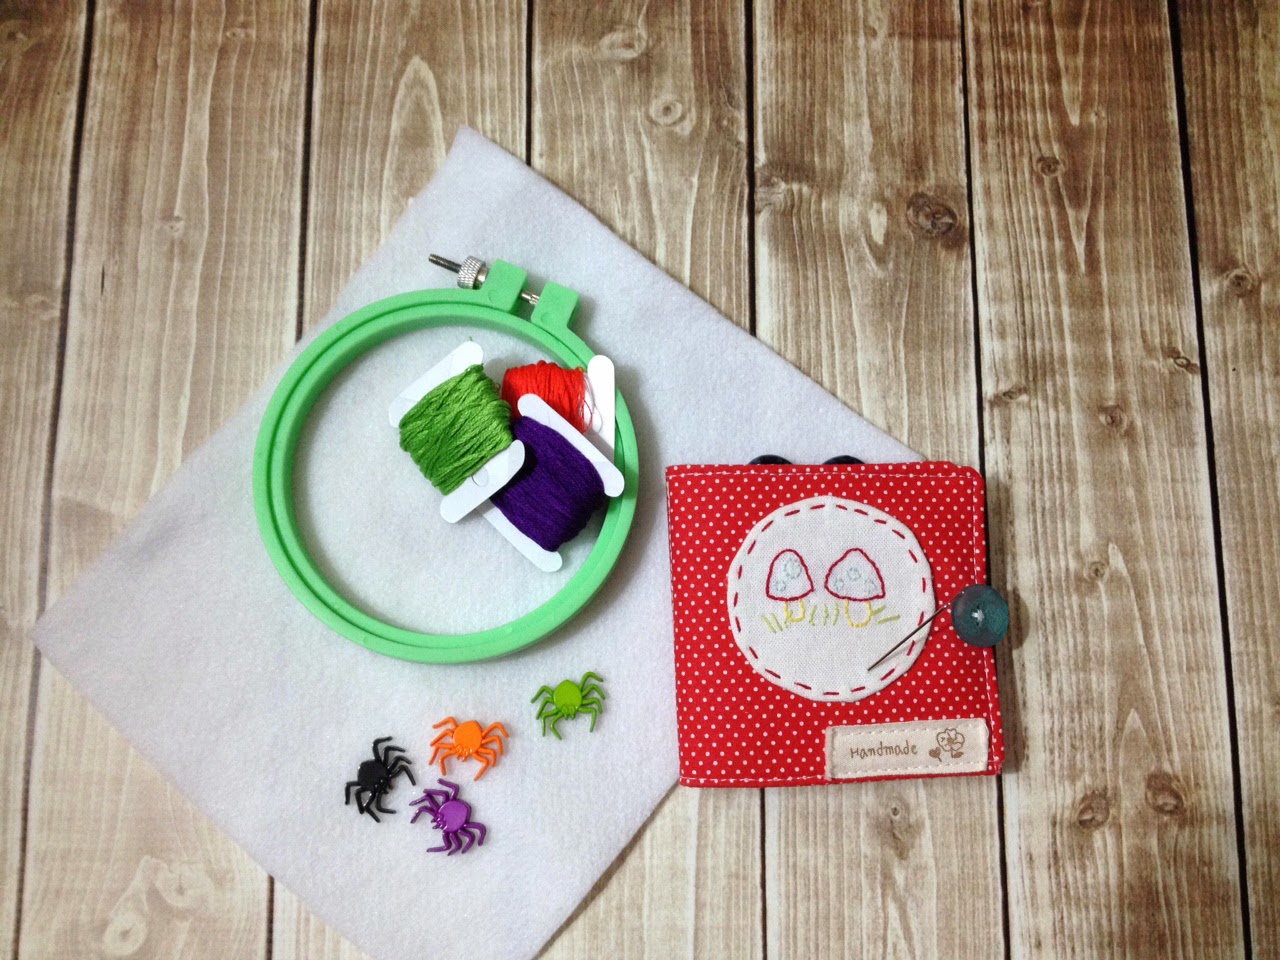
To make the felt patch, you will need:

- felt

- embroidery hoop

- embroidery floss

- needle

- heat transfer pencil

- iron

- scissors

- any embellishments you like


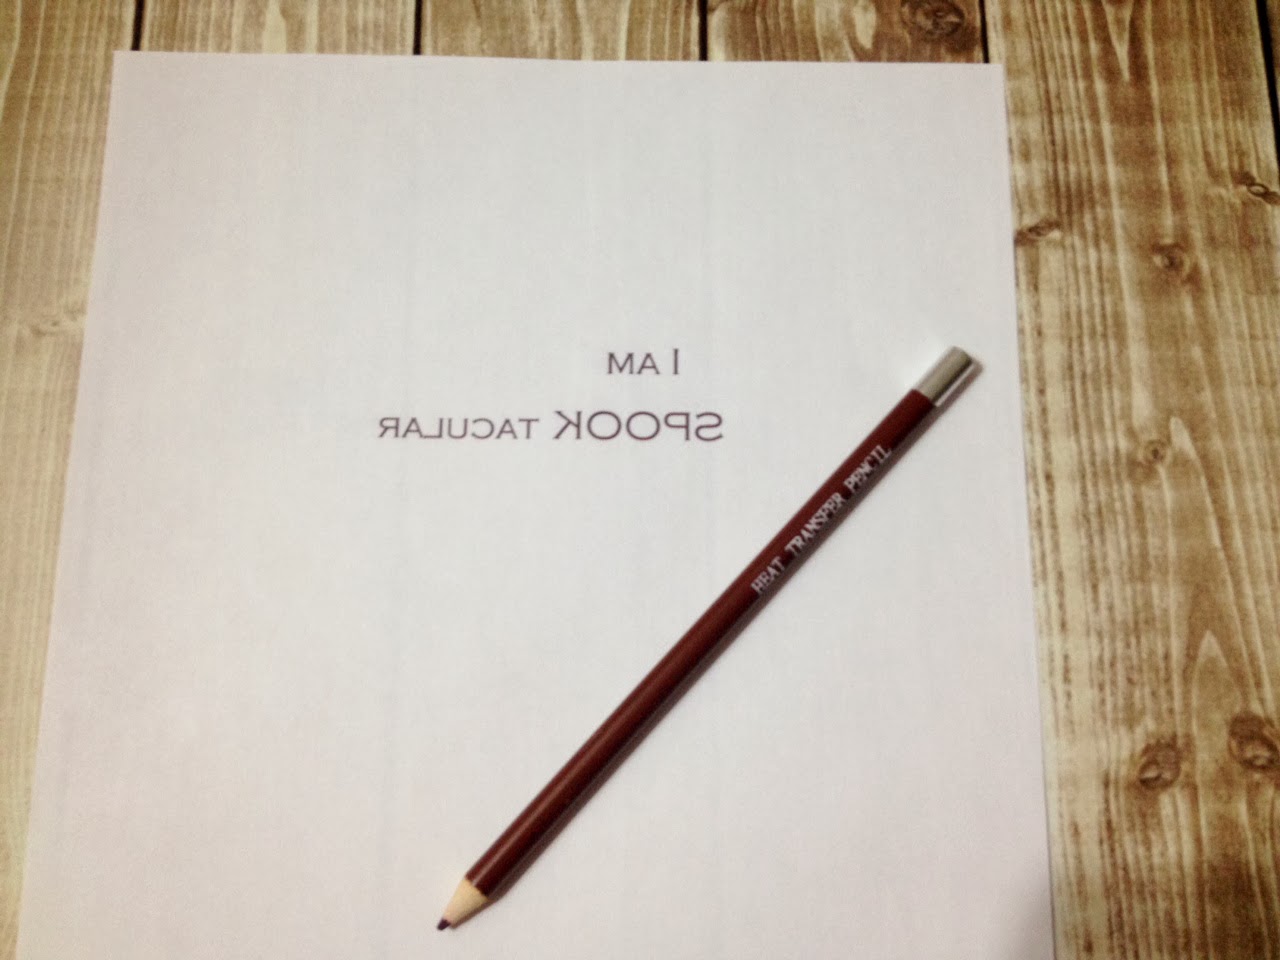
First, you will need to type the text  and then you will need to print it out. You will have to reverse the text before printing, because it will be backwards when you apply it to the felt.


Then I crabbed my  Hot  Iron Heat Transfer Pencil (bought it at Michael's), and traced over the text.


Then simply place the print on top of the felt face down and pressed it with a hot iron.


And now the text is transfered and ready.:)


The lines of the text will be permanent, so you will want to cover them completely with embroidery stitches.

I should say that I just love this part of the project.I am a total beginner in embroidery and I enjoy it so much. I just hope that one day I will be able to make something more complicated and beautiful. :)

So when you are done with embroidery and other embellishments, just simply sew the patch to the sleeve.And you are done!


Isn't it a fun and simple project? I got carried away and made another one...

..and another...


and 9 more :) They are all available in my shop.

I hope you will have fun making these cozies- and let me know if you have any questions!


Wish you all a very SPOOKtacular Halloween!


Pin It!

Friday, June 21, 2013

Lets celebtate the summer!

The summer is officially here, so lets celebrate!

Today I want to share Baby Barefoot Sandals crochet pattern.


To make these adorable sandals you will need:

-couple of hours of your free time
-yarn for sandals ( I used Patons Grace mercerized cotton from Michaels)
- yarn for the  flower (I used cotton thread yarn)
-Hook F/3.75 (for sandals)
-Hook B/3.25 (for the  flower)
-tapestry needle
-scissors


Lets begin.

Ch3
R1: sc in the 2nd ch from the hook, sc in the next st. (2)
R2: ch1, 2sc in each st. (4)
R3: ch1, sc in each st. (4)
R4: ch1, 2sc in the first st, sc in next 2 sts, 2 sc in the last st. (6)
R5: ch1, sc in each st. (6)
R6: ch1, 2sc in the first st, sc in next 4 sts, 2sc in the last st. (8)
R7: ch1, sc in each st. (8)
R8: ch1, 2sc in the first st, sc in the next 6 sts, 2sc in the last st.(10)
R9-12: ch1, sc in each st.(10)

 You have a "triangle"

Now you will be working around the "triangle"


Now we need to make a loop for a tiny toe. :) I made ch10, but you can adjust this number and make it smaller/larger.


Do not finish off. Now lets make tiebacks. Make ch35 and work sc in the 2nd ch from the st and in every st till the end. Than make sl st at to join tie back and the main part of the sandal and work sl st all the way to the other side.


And make second tieback the same way you did the first one: ch35, sc in the sc ch from the hook and in every ch till the end. Finish with sl st and finish off.

To make the flower:


With Hook B/3.25 make Ch 50 (Adjust number this number according to yarn weight) 

R1: make dc into the 5th ch from the hook, *skip one ch st, then make dc, ch1, dc into the next sts* repeat all the way till the end.


R2: *2dc, ch2, dc2 inside the next “V” stitch that you’ve created in the previous round. Repeat from * for every “V” stitch till the end of the row.  


R3: *make 10 dc into the ch2 space of the previous row* repeat this till the end. 


 Finish off leaving long tail for sewing. Start rolling it from one end to form a layered flower.


Sew the flower to the sandals and you are done! 


Now put them on precious little feet and get ready to receive tons of complements! :)


 Here is what on my mind:

I finally finished this little guy, I called him Ted. :)  He is completely stitch by hand. 


sitting on the bed and waiting for his clothes (I am working on it:)

His paws are movable, and he can sit without support. (Can you spot our kitty?:)
I bought this bed at IKEA, spray painted it , got 1/2 yarrd of fabric and other things at JoAnn...
 ...and sewed couple of pillows and matching quilt. I really liked how it turned out.


This is the sweater for the bear in progress...

and I am working on this new pattern-summer tunic for Alina. I can decided what color to choose-light or deep blue;) What do you think? 

I am planning to share this project with you really soon, so stay tuned! 

And don't forget to enter  my Simple Giveaway! The rules are super simple and there are 5 more days to join! 

Thanks for stopping by and have a great weekend, everyone!

~Tanya


Pin It!

Saturday, June 15, 2013

Something old is new again - Crochet Dress Pattern


I was organizing Alina's closet last week and found this dress that I made for her last year.
She didn't have a chance to wear it that much so I decided to try it on here and see if she can wear it this summer season. It fits her fine now, although it looks more like a shirt,and she need  shorts or  leggings to cover her little bum:)

You can find instructions on how to make this dress here.


Here is how I made tiny flowers:

Magic Ring, all stitches will be made inside the Magic Ring- *Ch3, 4 dc  cluster stitc h, Ch3, and slip stitch* repeat 4 more times. You will have 5 petals, then pull the ring tight and finish off.

You can find instructions on how to make dc cluster stitch here.


I sewed flowers to the dress, and added tiny pearls in the center of each flower.


I like it. And what do you think?! :)


xoxo,
Tanya


Pin It!

Sunday, January 27, 2013

Crochet Tiara pattern

Today I will share the pattern for this adorable crochet tiara!


Specially for Samantha! :) 

So to  make it you will need super fine yarn and crochet hook # B/2.25
Originally my idea was to make two crowns, one in blue and one in pink, for newborn twins. 
I couldn't find any super fine yarn in blue, so I decided to try embroidery floss and I really like how it turned out! 

Abbreviations:
sc-single crochet
sl-slip stitch
ch-chain
st-stitch  

Pattern:

Chain 72, join carefully not to twist. 

Row1: ch1, sc in every stitch till the end of the row, join with a sl st.

Row2: ch1, sc in the first st, ch5, skip 4 sts, 1sc in the next(5th) st-repeat till the end of the row.

Row3: {3sc, ch3 and sl st in the 3rd ch from the hook to form a picot, 3sc} repeat this into each ch5 space till the end. 

Fasten off and you are done! 

Easy, right? 

After finishing this tiara, I put it on a jar, making sure it fits snugly, and sprayed it with fabric stiffener.

I hope my instructions make sense:) 

Please feel free to post your creations  on my FB page!

As always, 

HAPPY CROCHETING! 


Pin It!

Thursday, January 10, 2013

Phone sweater pattern

One of my New Years Resolutions was to post at least once a week. It is only the second week of the year but I am already behind. I just feel that there are not enough minutes in an hour, not enough seconds in a minute. There are so much that needs to be done and so much to be said. Well, I think I just need to learn to focus on thing at a time!  

Today I want to share a pattern- a sweater for a cell phone. :) 

I know it is silly, but it is cold out and everyone needs to feel warm and loved, even the phone!


To make one you will need:

Scraps of worsted weight yarn
Knitting needles #3
Crochet hook # F/3.75
Any embellishment you like (or not, it is up to you)

I will be using these abbreviations:

K- knit
OY- yarn over 
Sc- single crochet

 Pattern:

With #3 needles cast on 24 stitches.
Row 1: Knit 1, Purl 2- repeat till the end.(24 stitches)
Row 2-8: Knit all knit stitches and purl all purl stitches.
Row 9: K2, YO, K2, YO, K3, YO, K2, YO, K6, YO, K2, YO, K3, YO, K2, YO, K2 (32 stitches).
Row 10: Purl all stitches.
Row 11: K3, YO, K2, YO, K5, YO, K2, YO, K8, YO, K2, YO, K5, YO, K2, YO, K3 (40 stitches).
Row 12: Purl all stitches.
Row 13: K4, YO, K2, YO, K7, YO, K2, YO, K10, YO, K2, YO, K7, YO, K2, YO, K4 (48 stitches).
Row 13: Purl all stitches.
Row 14: K5, YO, K2, YO, K9, YO, K2, YO, K12, YO, K2, YO, K9, YO, K2, YO, K5 (56 stitches).
Row 15: Purl all stitches.
Row 16: Bind off all stitches.But Do not cut the yarn off. The first part of the project is done:
Now you will need to rearrange you finished piece, so you can visualize the "sleeves" and the main part of the sweater. I am using stitch markers just to show where these parts are.


Now take the hook,and starting from the middle(it is going to be in the front of your piece) single crochet all around it, joining two it together. 

In next and every single row after that, sc in every stitch, working in the back loops only.

But you can choose any pattern you want, play with it!:)

Here is my finished sweater:
And this is the back view:
I added a heart button on top of crocheted heart. I used  this great tutorial to make one! 

It is very simple but what a fun project to do! 

I would love to see your creations! 

Please feel free to post them on my facebook page! 

Happy Crafting, everyone! :)


Pin It!