Showing posts with label Tutorials. Show all posts

Wednesday, April 16, 2014

Free pattern: Bunny Egg Warmer


Today I have a free pattern for you.:)


Easter Bunny egg warmer/cozy.


To make these cuties you will need:
~ scraps of yarn (I used worsted weight)
~ Hook F/3.75
~ embroidery floss
~ tiny piece of felt for the nose
~ scraps of fabric for the ears lining

Lets make the COZY first.

Round 1 : Ch2,6 sc in the 2nd ch from the hook. (6)
Do not join, place the stitch marker.
Round 2: 2 sc in each st around. (12)
Round 3: sc in each st around. (12)
Round 4: *sc in 1st st, 2sc in the next st* repeat all the way around. (18) 
Round 5: sc all the way around. (18)
Round 6: *sc in the next 2 sts, 2sc in the next st* repeat all the way around. (24)
Round 7-11: sc all the way around. (24)
Round 12: crab stitch all the way around. Finish off.
The last round is optional, but I LoVe crab stitch (also known as “reverse single crochet” ! If you’ve never tried this stitch, you should :) Here is a great video tutorial. 


 Now let’s work on the EARS (make 2): 

 Round 1:CH9,  sc in the 2nd ch from the hook, sc in the next 3 sts, hdc in the next 2 sts, dc in the next sts, 3dc in the last st; now working on the other side of the foundation chain- 2dc in the 1st st(this stitch already has 3dc),dc in the next st, hdc in the next 2 sts, sc in the next 4 sts.
Round 2: sc all the way around.
Finish off. Repeat this to make second ear.


Now cut out the fabric for the lining and sew it to the inside of each ear.
I used crocheted ears as my templates, I placed them on fabric and traced around them with a fabric marker.
Now sew the ears to the cozy 


Add the  tiny felt nose and embroider the  eyes


And of course we can not forget about the cute bunny tail. 


And you are done! Hoo-ray! 

I wish everyone Happy Easter and Happy Spring! :) 


Pin It!

Wednesday, October 30, 2013

Spooktacular coffee cup sleeve tutorial

Today I wanted to share this very simple coffee cup sleeve pattern.


I decided to choose Halloween theme for this one, but of course, the possibilities are endless, especially with the Holidays coming. :)

To make this cup cozy, you will need:

- #3/light yarn

- crochet hook # F/3.75

The pattern: 

Ch36, join carefully-not to twist the stitches.

I am using tall Starbucks cup.

Round 1-4: sc all the way around. Place a stitch marker to know where each round ends.

Round 5: 2sc in the 1st stitch, sc in the next 17 sts, 2 sc in the next st, sc in the next 17 sts.

Round 6-13: sc all the way around.

Round 14: work crab stitch all the way around.

Finish off, weave in ends.


Now when the sleeve is done, the fun part begins;)


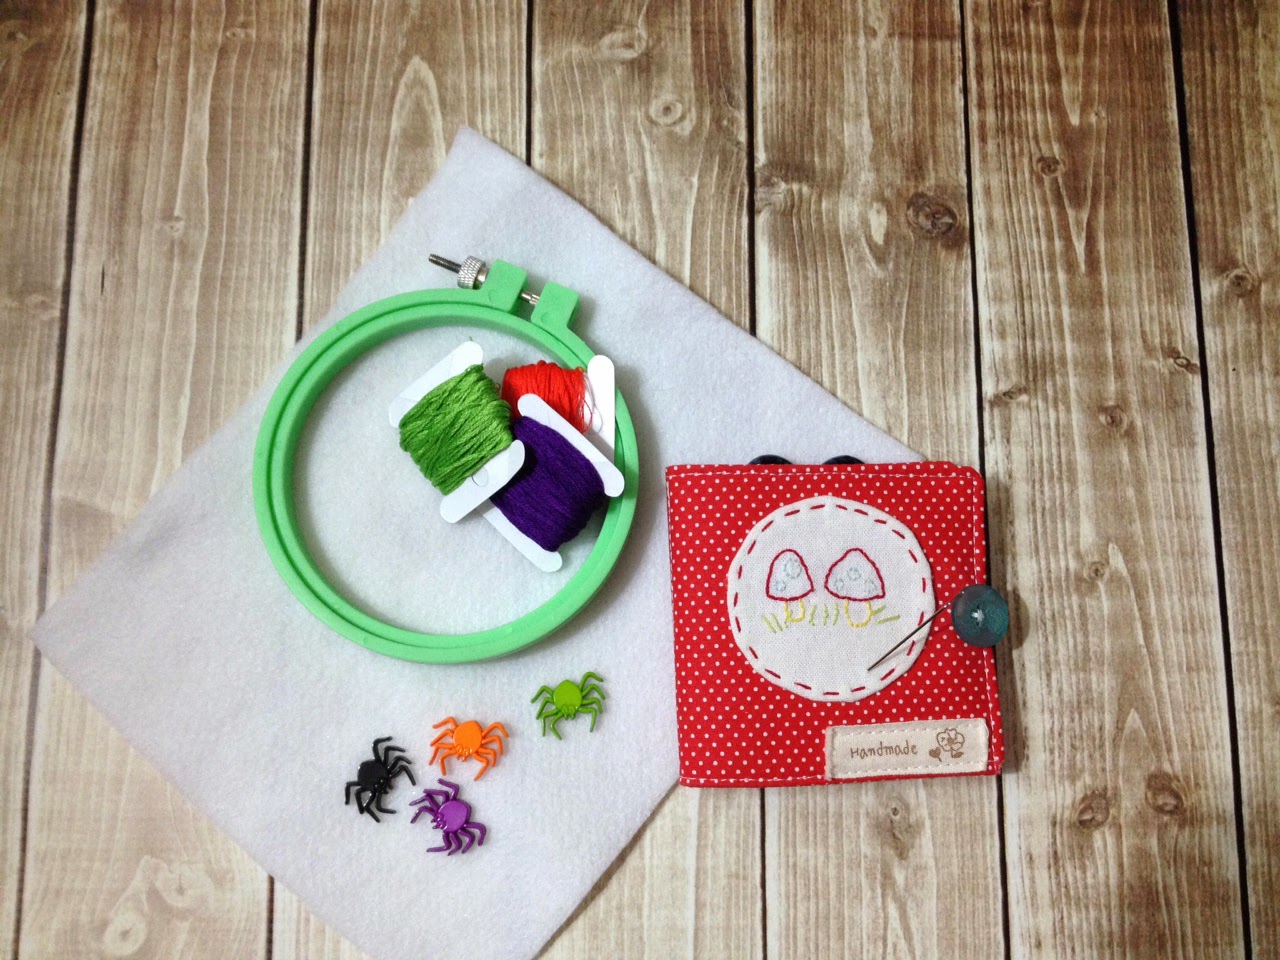
To make the felt patch, you will need:

- felt

- embroidery hoop

- embroidery floss

- needle

- heat transfer pencil

- iron

- scissors

- any embellishments you like


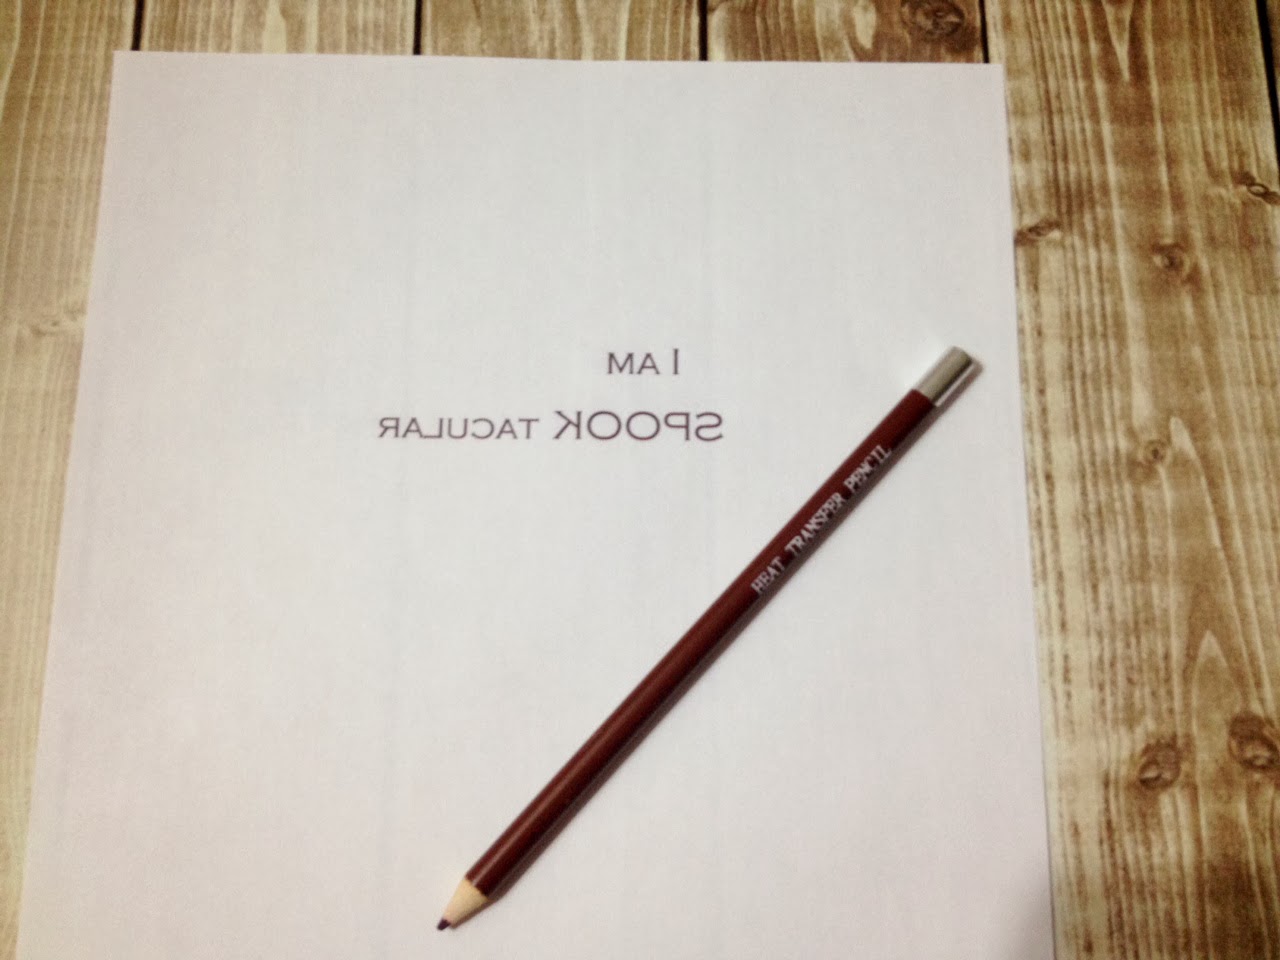
First, you will need to type the text  and then you will need to print it out. You will have to reverse the text before printing, because it will be backwards when you apply it to the felt.


Then I crabbed my  Hot  Iron Heat Transfer Pencil (bought it at Michael's), and traced over the text.


Then simply place the print on top of the felt face down and pressed it with a hot iron.


And now the text is transfered and ready.:)


The lines of the text will be permanent, so you will want to cover them completely with embroidery stitches.

I should say that I just love this part of the project.I am a total beginner in embroidery and I enjoy it so much. I just hope that one day I will be able to make something more complicated and beautiful. :)

So when you are done with embroidery and other embellishments, just simply sew the patch to the sleeve.And you are done!


Isn't it a fun and simple project? I got carried away and made another one...

..and another...


and 9 more :) They are all available in my shop.

I hope you will have fun making these cozies- and let me know if you have any questions!


Wish you all a very SPOOKtacular Halloween!


Pin It!

Wednesday, July 31, 2013

For the book lovers.

This summer I have been sooooo lazy. My mind is melting because of the heat and humidity, and I am secretly dreaming about three quarter sleeves, boots, cozy cowls and fresh autumn air. I know that when November comes with all its wetness and gloominess, I will start counting days till summer :) I know, human nature, and I can't help it...

So this summer is not as productive as I want it to be, but I still managed to complete some of the protects that have been on my list for a long time. This library tote is one of them :)


The school year will start before we know it, so I thought maybe you, my creative friends, would like to make this  tote for your child, for your friend or  for yourself:)

Working on this project I decided to experiment with materials. I wanted this tote to have canvas feel and look, and I had trouble finding that perfect yarn for it. Then shopping in Home Depot, I came across this household twine.
I believe it was $2.97 per "skein" and I used a little bit over two.I would compare it to medium weight yarn. But of course,you can use any type of yarn you like, the household twine is just my personal preference.:) 

With Hook #H/5.00 make Ch58

Round: dc in the 4th ch from the hook and in every st until just one last st is left, then 5dc sts in the last st; now working on the other side of the foundation chain,work dc in every st till the very last st, them 4dc in the last st, and join with sl st into the 3rd ch of ch3. This is going to be the bottom of the tote. 

Round 2: From now on,you will be working in rounds without joining, so you can place stitch marker here to know where each round begins. Work sc in every st around working in back loops only.
Repeat Round 2 as many times as you need to achieve the desired look. I completed 45 rounds and my finished tote measures 13"x14".

Now the handles (make 2): 
Before making the chain, leave long tail for sewing the handle to the tote.
Ch81
Make sc in the 2nd ch from the hook and in the next 79 sts, until just one last st remains, then 5sc sts  in the last st, now working on the other side of the foundation chain, work  sc in every st till the very last st, then 4sc sts in the last st, join with sl to the ch1. Finish off leaving long tail for sewing.  


Now the fun part begins :) I downloaded Grinched Font here, typed  my favorite Dr.Suess quote in Word Document,  and then I printed it on heat transfer paper (bought it at Walmart for about $9)

When you are ready to print the transfer, make sure you flip the image. I couldn't do it in Word, it didn't give me that option, but luckily my printer had "t shirt  transfer" setting,so I checked that box and it printed my image exactly how I need it to be.

Then I took the piece of cotton fabric, ironed it first, and transfered my image to the fabric following the instructions that came with the transfer paper. The I cut out the part that I needed and glued it to my tote. 
Then made the bow and the hat:) 
And glued them too. 


 I really like that the twine does not stretch as a regular yarn does, so the handles do not stretch  and do not pinch the shoulder.

I also added lining with a pocket. I can not give instructions on that one because the sewing is not the area of my expertise :))   I am sure there are tons of great tutorials out there that explain this simple step. I just went with the flow and I really like how it turned out! :) 


Now the trips to the library have become  even more exciting!!! 


xoxo, 
Tanya


Pin It!

Friday, June 21, 2013

Lets celebtate the summer!

The summer is officially here, so lets celebrate!

Today I want to share Baby Barefoot Sandals crochet pattern.


To make these adorable sandals you will need:

-couple of hours of your free time
-yarn for sandals ( I used Patons Grace mercerized cotton from Michaels)
- yarn for the  flower (I used cotton thread yarn)
-Hook F/3.75 (for sandals)
-Hook B/3.25 (for the  flower)
-tapestry needle
-scissors


Lets begin.

Ch3
R1: sc in the 2nd ch from the hook, sc in the next st. (2)
R2: ch1, 2sc in each st. (4)
R3: ch1, sc in each st. (4)
R4: ch1, 2sc in the first st, sc in next 2 sts, 2 sc in the last st. (6)
R5: ch1, sc in each st. (6)
R6: ch1, 2sc in the first st, sc in next 4 sts, 2sc in the last st. (8)
R7: ch1, sc in each st. (8)
R8: ch1, 2sc in the first st, sc in the next 6 sts, 2sc in the last st.(10)
R9-12: ch1, sc in each st.(10)

 You have a "triangle"

Now you will be working around the "triangle"


Now we need to make a loop for a tiny toe. :) I made ch10, but you can adjust this number and make it smaller/larger.


Do not finish off. Now lets make tiebacks. Make ch35 and work sc in the 2nd ch from the st and in every st till the end. Than make sl st at to join tie back and the main part of the sandal and work sl st all the way to the other side.


And make second tieback the same way you did the first one: ch35, sc in the sc ch from the hook and in every ch till the end. Finish with sl st and finish off.

To make the flower:


With Hook B/3.25 make Ch 50 (Adjust number this number according to yarn weight) 

R1: make dc into the 5th ch from the hook, *skip one ch st, then make dc, ch1, dc into the next sts* repeat all the way till the end.


R2: *2dc, ch2, dc2 inside the next “V” stitch that you’ve created in the previous round. Repeat from * for every “V” stitch till the end of the row.  


R3: *make 10 dc into the ch2 space of the previous row* repeat this till the end. 


 Finish off leaving long tail for sewing. Start rolling it from one end to form a layered flower.


Sew the flower to the sandals and you are done! 


Now put them on precious little feet and get ready to receive tons of complements! :)


 Here is what on my mind:

I finally finished this little guy, I called him Ted. :)  He is completely stitch by hand. 


sitting on the bed and waiting for his clothes (I am working on it:)

His paws are movable, and he can sit without support. (Can you spot our kitty?:)
I bought this bed at IKEA, spray painted it , got 1/2 yarrd of fabric and other things at JoAnn...
 ...and sewed couple of pillows and matching quilt. I really liked how it turned out.


This is the sweater for the bear in progress...

and I am working on this new pattern-summer tunic for Alina. I can decided what color to choose-light or deep blue;) What do you think? 

I am planning to share this project with you really soon, so stay tuned! 

And don't forget to enter  my Simple Giveaway! The rules are super simple and there are 5 more days to join! 

Thanks for stopping by and have a great weekend, everyone!

~Tanya


Pin It!