Showing posts with label For Baby. Show all posts

Friday, June 21, 2013

Lets celebtate the summer!

The summer is officially here, so lets celebrate!

Today I want to share Baby Barefoot Sandals crochet pattern.


To make these adorable sandals you will need:

-couple of hours of your free time
-yarn for sandals ( I used Patons Grace mercerized cotton from Michaels)
- yarn for the  flower (I used cotton thread yarn)
-Hook F/3.75 (for sandals)
-Hook B/3.25 (for the  flower)
-tapestry needle
-scissors


Lets begin.

Ch3
R1: sc in the 2nd ch from the hook, sc in the next st. (2)
R2: ch1, 2sc in each st. (4)
R3: ch1, sc in each st. (4)
R4: ch1, 2sc in the first st, sc in next 2 sts, 2 sc in the last st. (6)
R5: ch1, sc in each st. (6)
R6: ch1, 2sc in the first st, sc in next 4 sts, 2sc in the last st. (8)
R7: ch1, sc in each st. (8)
R8: ch1, 2sc in the first st, sc in the next 6 sts, 2sc in the last st.(10)
R9-12: ch1, sc in each st.(10)

 You have a "triangle"

Now you will be working around the "triangle"


Now we need to make a loop for a tiny toe. :) I made ch10, but you can adjust this number and make it smaller/larger.


Do not finish off. Now lets make tiebacks. Make ch35 and work sc in the 2nd ch from the st and in every st till the end. Than make sl st at to join tie back and the main part of the sandal and work sl st all the way to the other side.


And make second tieback the same way you did the first one: ch35, sc in the sc ch from the hook and in every ch till the end. Finish with sl st and finish off.

To make the flower:


With Hook B/3.25 make Ch 50 (Adjust number this number according to yarn weight) 

R1: make dc into the 5th ch from the hook, *skip one ch st, then make dc, ch1, dc into the next sts* repeat all the way till the end.


R2: *2dc, ch2, dc2 inside the next “V” stitch that you’ve created in the previous round. Repeat from * for every “V” stitch till the end of the row.  


R3: *make 10 dc into the ch2 space of the previous row* repeat this till the end. 


 Finish off leaving long tail for sewing. Start rolling it from one end to form a layered flower.


Sew the flower to the sandals and you are done! 


Now put them on precious little feet and get ready to receive tons of complements! :)


 Here is what on my mind:

I finally finished this little guy, I called him Ted. :)  He is completely stitch by hand. 


sitting on the bed and waiting for his clothes (I am working on it:)

His paws are movable, and he can sit without support. (Can you spot our kitty?:)
I bought this bed at IKEA, spray painted it , got 1/2 yarrd of fabric and other things at JoAnn...
 ...and sewed couple of pillows and matching quilt. I really liked how it turned out.


This is the sweater for the bear in progress...

and I am working on this new pattern-summer tunic for Alina. I can decided what color to choose-light or deep blue;) What do you think? 

I am planning to share this project with you really soon, so stay tuned! 

And don't forget to enter  my Simple Giveaway! The rules are super simple and there are 5 more days to join! 

Thanks for stopping by and have a great weekend, everyone!

~Tanya


Pin It!

Saturday, June 15, 2013

Something old is new again - Crochet Dress Pattern


I was organizing Alina's closet last week and found this dress that I made for her last year.
She didn't have a chance to wear it that much so I decided to try it on here and see if she can wear it this summer season. It fits her fine now, although it looks more like a shirt,and she need  shorts or  leggings to cover her little bum:)

You can find instructions on how to make this dress here.


Here is how I made tiny flowers:

Magic Ring, all stitches will be made inside the Magic Ring- *Ch3, 4 dc  cluster stitc h, Ch3, and slip stitch* repeat 4 more times. You will have 5 petals, then pull the ring tight and finish off.

You can find instructions on how to make dc cluster stitch here.


I sewed flowers to the dress, and added tiny pearls in the center of each flower.


I like it. And what do you think?! :)


xoxo,
Tanya


Pin It!

Sunday, June 9, 2013

Very wise owl FREE crochet PATTERN

Do you know someone who is graduating this summer and do you want to congratulate them with a special gift? What could be better then a gift made with your own hands! :)
So today I will show you how to make this VERY wise owl!


You will need:

-worsted weight yarn ( two colors for the body and wings, yellow for the beak, white, blue and black for eyes)
- Hook # F/3.75
- black felt for hat
- yellow embroidery floss to make a tassel
- brow felt and brown thread to make feet
- paper and red thread for the diploma
- Poly-fill
- needle and scissors

Lets make the owl!

Head-body:
Ch2

Round 1: 6sc in the 2nd ch form the hook. Do not join, place stitch marker. (6)
Round 2: 2sc in every st around.(12)
Round 3: *sc in 1st st, 2sc in the next st* repeat all the way around. (18)
Round 4: *sc in next 2 sts, 2sc in the next sts* repeat all the way around. (24)
Round 5: *sc in next 3 sts, 2sc in the next sts* repeat all the way around. (30)
Round 6: *sc in next 4 sts, 2sc in the next sts* repeat all the way around. (36)
Round 7: *sc in next 5 sts, 2sc in the next sts* repeat all the way around. (42)
Round 8: *sc in next 6 sts, 2sc in the next sts* repeat all the way around. (48)
Round 9-23: sc in every st around (48) Change to contrast yarn color for Round 13 and Round 17.
Round 24: *sc in next 6 sts, sc dec* repeat all the way around.(42)
Round 25: sc in every st around. (42)
Round 26: *sc in next 5 sts, sc dec* repeat all the way around.(36)
Round 27: sc all the way around. (36)
Round 28: *sc in next 4 sts, sc dec* repeat all the way around. (30)
Round 29-34: sc all the way around.
Now stuff with Poly-fill.
At this point you will need to make about 6-7 sc so that the "right side"-where the face will be is now facing you, fold the body in half and join with sc st- work sc sts until you reach the middle, then make slip st in the st 4 Rounds below.

Then continue working sc till the end. Finish off.

Now cut 6-8 strands of yarn for each ear.Line the ends up and attach them to the ears. Trim the strands so they are even.


To make Eyes (make 2):
Starting with black yarn make Ch2.
Round 1: 6sc in the 2nd ch from the hook. (6)
Change to blue yarn and continue.
Round 2: 2sc in every st around. (12)
Round 3: *sc in 1st st, 2sc in the next st* repeat all the way around. (18)
Change to white color yarn.
Round 4: *sc in next 2 sts, 2sc in the next st* repeat all the way around. (24)
Round 5: *sc in next 3 sts, 2sc in the next st* repeat all the way around. (30)
Finish off leaving long tail for sewing.

Beak:
With yellow yarn make Ch2

Row 1: 2sc in the 2nd ch from the hook. (2)
Row 2: sc in every st. (2)
Row 3: 2sc in every st. (4)
Row 4: sc in every st. (4)
Then work sc evenly around the beak making 2sc in the bottom corner. Finish off, leaving long tail for sewing.

To make Wings (make 2):
Starting with Color A( I used blue), make Ch2
Round 1: 6 sc sts in the 2nd ch from the hook. (6)

Round 2: 2sc sts in each st around. (12)
Round 3: *sc in the first st, 2sc in the next sts* repeat all the way around. (18)
Round 4: sc all the way around. (18)
Change to color B.
Round 5-12: sc all the way around. (18) 
Round 13: *sc in next st, sc dec* repeat all the way around. (12) 
Round 14: sc dec all the way around.
Finish off leaving long tail for sewing.

Now when all parts are done, the wise owl is about to be born. Sew eyes, beak and wings to the body. 


Make the feet out of felt and sew it to the body.

To make the hat,you will need to cut out of felt:
-two 2x2 pieces  
- 1/2 inch wide and 4 inches long piece

Sew two ends together.

Join the bottom piece with the top one with couple of stitches.


Place the second square on top and join it with a blanket stitch.


And it is done!

Just add a tassel and put it on your very wise owl! :)


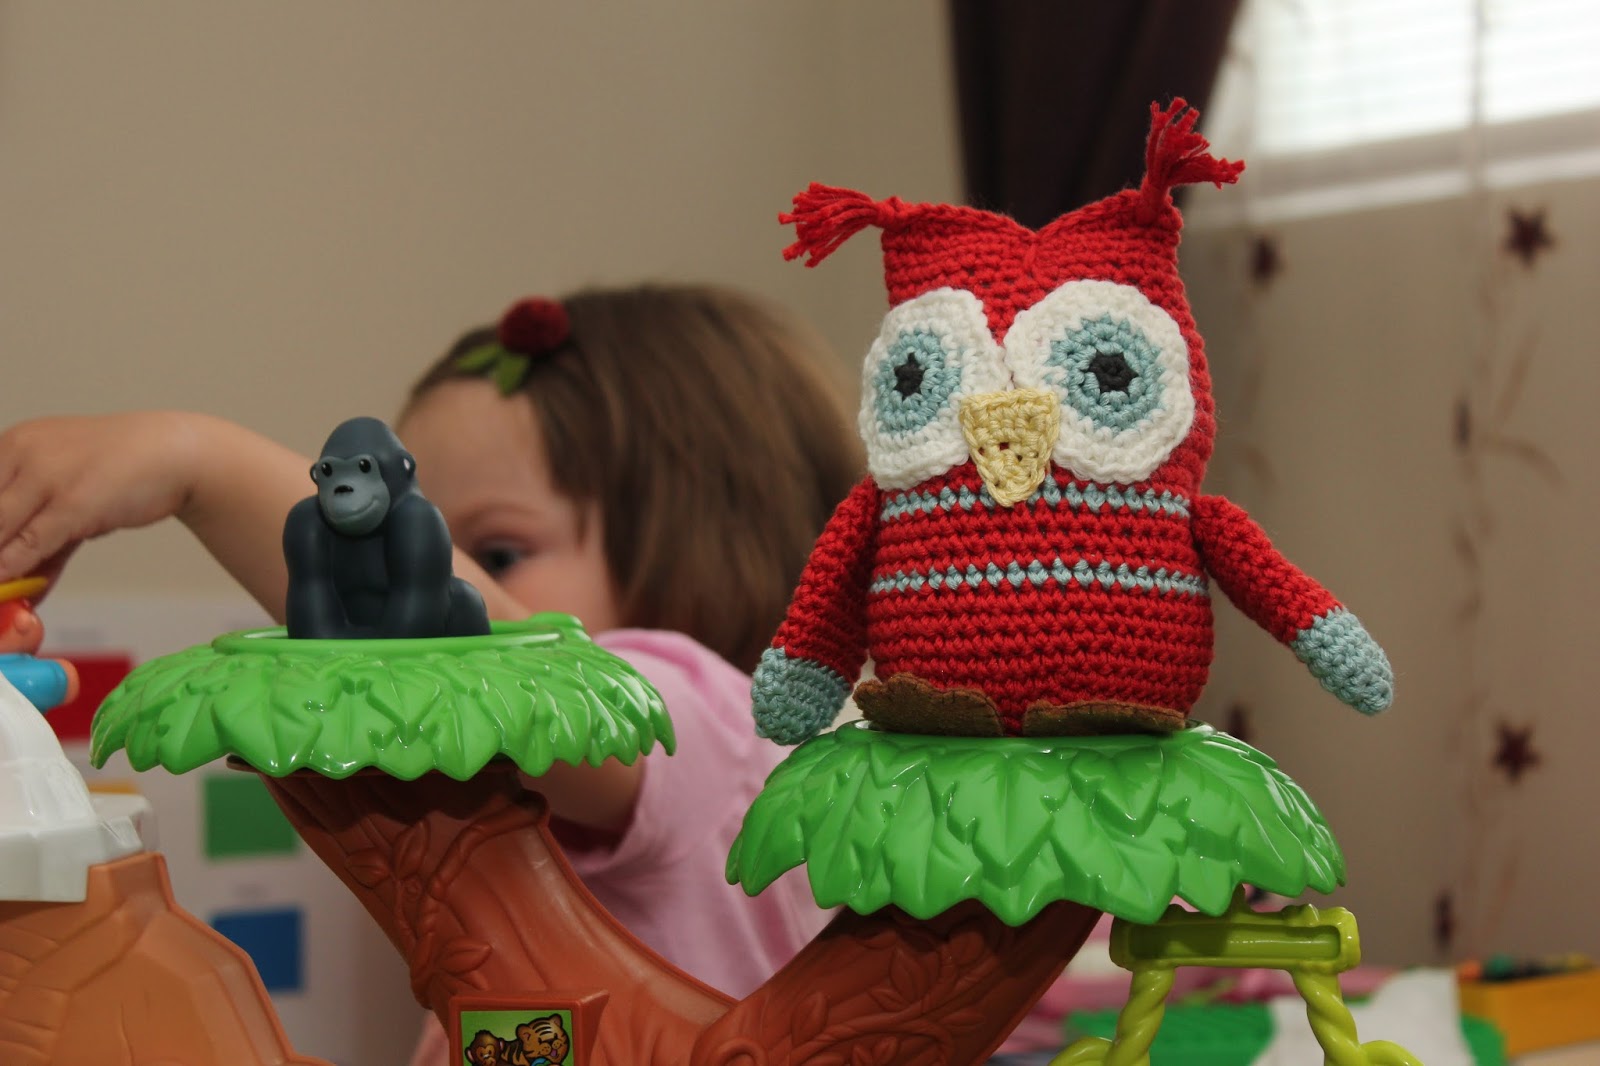
After graduation my owl left her hat and diploma on the shelf and joined Alina's Zoo! :)


She met new friends...

and is having a lot of fun around here!

Even wise owls need a break! :)


Pin It!

Wednesday, August 15, 2012

Caterpillar Rattle FREE pattern


Today I am going to share the crochet pattern for this adorable caterpillar rattle.


I used:
Lily Sugar'n Cream cotton yarn
bells
 polyester Stuffing
velcro tape 
2 buttons 
crochet hook

Abbreviations: 
Ch- chain
dc- double crochet
sc-single crochet
hdc-half double crochet
sc2tg- single crochet two together
sl st- slip stitch
st-stitch

I made 4 balls in different colors using  H/8 hook and following this simple pattern:

The crochet ball:

Row 1: ch 2, 6 sc in the 2nd ch from the hook (6)
Row 2: 2 sc in each sc st till the end (12)
Row 3: {sc, 2 sc in the next st} repeat 6 times (18)
Row 4: {sc in next 2 sts, 2sc in the next st} repeat 6 times (24)
Row 5: {sc in next 3 sts, 2sc in the next} repeat 6 times (30)
Row 6: {sc in next 4 sts, 2sc in the next st} repeat 6 times (36)
Row 7: {sc in next 5 sts, 2sc in the nextt st} repeat 6 times (42)
Row 8: {sc in the next 6 sts, 2sc in the next st} repeat 6 times (48)
Row 9-16: sc in each st around (48)
Row 17: {sc in next 6 sts, sc2tg  in the next st} repeat 6 times (42)
Row 18: {sc in next 5 sts, sc2tg  in the next st} repeat 6 times (36)
Row 19: {sc in next 4 sts, sc2tg  in the next} repeat 6 times (30)
Row 20: {sc in next 3 sts, sc2tg in the next st} repeat 6 times (24)

At this point I put some stuffing in it, than placed the bell in the center, arranged stuffing around it so I couldn't even tell that it was there and stuffed a little bit more.

Row 21: {sc in next  2 sts, sc2tg  the nextt st} repeat 6 times (18)
Row 22: {sc, sc2tg in the next st} repeat 6 times (12)
Row 23: decrease 6 times- sc2tg all around. (6)
 Finish off.

The head: 

Using the same pattern start with one color( I used white) and continue till the Row 6. Then change to another color and continue till the end. 

The antennae:

I used white yarn.

Ch 12, hdc in the 3rd ch from the hook, dc, hdc, 7 sl sts.
  
Now we just need to make another one to complete the pair and sew it to the top of the head.

The Eyes:

We will need to make two of these.

Row 1: Ch 4, 3 sc in the 2nd ch from the hook,  sc in the next st, 3 sc in the last st and one more sc on the other side of the foundation chain.

Row 2: sc, 2sc in the next st, 3 sc, 2sc in the next st, 2 sc.  Finish off.

Now we can start putting everything together and bringing out caterpillar to life. ))

I used tiny black buttons for eyes, pom-pon as nose and white cut out mouth. I used the hot glue gun but if the safety is your concern, you can use  embroidery floss to make eyes, nose and mouth.


Then I glued velcro fasteners to each ball ( the head and the last one will have velcro only on one side)

and our Funny Caterpillar- Rattle is ready!!! ))) 

Alina loves separating and putting it back together, and the sound make her smile too))))))))


Of course  you can improvise- using different types of yarn and colors. To make it smaller just use smaller size hook. 


Happy crafting!!!


xoxo


Pin It!

Saturday, July 21, 2012

Crochet summer baby dress


I cannot believe that in couple of weeks Alina will be one year old! It seems just yesterday we brought her home-fragile little creature-and today she is almost walking and “talking”! So I started making some projects for this occasion, and one of them is the dress that I finally finished.


It is super easy to make and it can be adjusted to any size with no problem.

Here is how I made it:

Abbreviations:
Ch- chain
dc- double crochet
st-stitch
sc-single crochet

 I used cotton yarn and 1/2.75mm hook.

Make as manychains as you need, so that baby's head will easely go through the opening.


When you have enough chains, join and start Row 1.

 Round 1: Ch 2, dc in every st till the end, join.

Round 2: Ch 5, skip one dc and make dc in next st, *ch2, skip dc and make dc in the next st* repeat till the end of the Row and join.


Round 3: Ch2, dc in next 4 sts, 2 dc in the 5th st(making increases in every 5th st), repeat till the end and join.


Round 4: same as Row 2.

Round 5: Ch 2, dc in the next 5 sts, 2 dc in the 6th st (making increases in every 6th  st), repeat till the end, join.
Round 6: same as Row 4 and Row 2.
Round 7: Ch 2, dc in the next 6 st, 2 dc in the 7th st (making increases in every 7th st), repeat till the end, join.


  Round 8: same as Round 2, 4 and 6.
Now at this point I took stitch marker ( safety pin will also work) and joined together stitches from front and back, leaving  holes for arms on both sides.


And from now on you will be working only on the main part of the dress.

Round 9: Ch 2,dc in every st till the end, join.

Round 10: same as Round 8.
Now the fun part begins- at this point you can choose any any pattern you want, whatever you like!
I continued this way:
Round 11: Ch 5, skip one arch, sc in the next one, repeat till the end.
I used this diagram for the next 6 Rounds:

Round 12-16: Ch 5, sc in next arch, repeat till the end. 
Round 17: *Dc in next arch, ch 5, dc in the same arch, dc in the next arch, ch 5, dc in the same arch*
Round 18: 6 dc in each ch5 space, repeat till the end.
 
Then I just repeat Round 17 and 18 twice, and repeat steps from Round 11 and 12-16. Finally it looks like this:


It is so light and breathable,just perfect for summer!


Pin It!