Showing posts with label Decor. Show all posts

Wednesday, April 16, 2014

Free pattern: Bunny Egg Warmer


Today I have a free pattern for you.:)


Easter Bunny egg warmer/cozy.


To make these cuties you will need:
~ scraps of yarn (I used worsted weight)
~ Hook F/3.75
~ embroidery floss
~ tiny piece of felt for the nose
~ scraps of fabric for the ears lining

Lets make the COZY first.

Round 1 : Ch2,6 sc in the 2nd ch from the hook. (6)
Do not join, place the stitch marker.
Round 2: 2 sc in each st around. (12)
Round 3: sc in each st around. (12)
Round 4: *sc in 1st st, 2sc in the next st* repeat all the way around. (18) 
Round 5: sc all the way around. (18)
Round 6: *sc in the next 2 sts, 2sc in the next st* repeat all the way around. (24)
Round 7-11: sc all the way around. (24)
Round 12: crab stitch all the way around. Finish off.
The last round is optional, but I LoVe crab stitch (also known as “reverse single crochet” ! If you’ve never tried this stitch, you should :) Here is a great video tutorial. 


 Now let’s work on the EARS (make 2): 

 Round 1:CH9,  sc in the 2nd ch from the hook, sc in the next 3 sts, hdc in the next 2 sts, dc in the next sts, 3dc in the last st; now working on the other side of the foundation chain- 2dc in the 1st st(this stitch already has 3dc),dc in the next st, hdc in the next 2 sts, sc in the next 4 sts.
Round 2: sc all the way around.
Finish off. Repeat this to make second ear.


Now cut out the fabric for the lining and sew it to the inside of each ear.
I used crocheted ears as my templates, I placed them on fabric and traced around them with a fabric marker.
Now sew the ears to the cozy 


Add the  tiny felt nose and embroider the  eyes


And of course we can not forget about the cute bunny tail. 


And you are done! Hoo-ray! 

I wish everyone Happy Easter and Happy Spring! :) 


Pin It!

Saturday, December 8, 2012

Cozy Mug crochet pattern with snowflake applique

The Christmas is around the corner, so I decided to share this fun and super cute mug cozy pattern with snowflake appliqué, which can be used by itself in so many ways- make a garland, ornaments, and other holiday decoration!


Make them for yourself, relatives, friends!

They are quick to make, so I am sure you will make them for everyone! :)


Materials:
F/3.75 hook for the cozy
B/2.25 hook for applique
#4/worsted weight yarn in the color of your choice
#1/super fine weight yarn for snowflakes
Button
Yarn needle

Measurements:
In this pattern I use my mug as an example, but please feel free to experiment as your cup might be bigger or smaller than mine.
Also you can use worsted weight yarn and F hook to make snowflakes. But please keep in mind that in this case they will be bigger.

Abbreviations:
Ch – chain
Sc- single crochet
Sl st- slip stitch
Dc – double crochet
PS- puff stitch

Special Stitch:
Puff stitch- ***Yarn over, and insert the hook into the appropriate stitch***repeat two more times. You will have 7 loops on the hook. Yarn over and pull through all 7 loops***

Pattern:
Chain 53 stitches. This number can be different-less or more depending on the size of your mug.
Just wrap it around the base of the mug to make sure it fits snuggly.


Row 1-2:ch1, sc all the way around. Join with sl st.
  
Now you will be working not in rounds, but back and forth.

Row 3: Ch1, sc in next 47 st, skipping last 5 stitches, ch 1, turn.
Row 4-12: sc in each st around, ch1, turn.
Complete as many rows as you need to cover your mug.

Now work sc all the way around the opening.

To make a button loop, make as many chain stitches as you need to fit the button (in my case I needed 10) and make a slip stitch into the first chain stitch.
Finish off. Weave in ends.

Optional: Join contrast color yarn and sc all the way around.

Snowflake applique:
Row1: Ch1, Magic ring, 7 sc inside the ring, join with sl st.
Row 2: Ch3,[PS(Yarn over, and insert the hook into the appropriate stitch***repeat two more times. You will have 7 loops on the hook. Yarn over and pull through all 7 loops), ch3] repeat 6 more times. You should end up having 7PSs divided by ch3 space.

Row 3: {Ch3, dc in the 1st PS;***ch3 and sl st into the first chain space (this makes first picot), repeat two more times to make two more picots.


Then make st sl into the base of the first picot to make one big picot
out of three.
Then ch3 and sc into the chain space of previous round.}
Repeat this 6 more times.

Finish off.

Make as many snowflakes as you need and sew them on to your cup cozy.
Sew the button on and enjoy!

:)


This pattern and photographs are the property of Karapooz Crochet.
© 2012


Pin It!

Monday, September 17, 2012

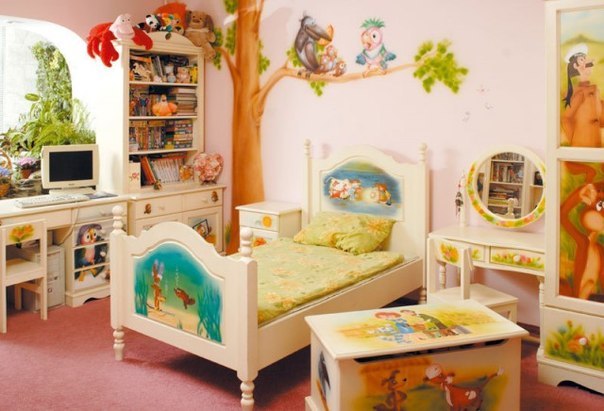
Many ideas for baby/kids room

For some time now  I've been dreaming to transform the baby's  room.

Also want to get or make a tent for me  Alina, put lots of pillows, get inside, turn on Constellation Night Light and create some lifetime memories! ))


I have been searching for some ideas, and found so many!


 I could live here!))


 Simple but sooooo adorable!
Add caption


I am in love with all of them!!!


Pin It!